World Painter For Vintage Story works by using a script to generate an intermediary file for World Painter,
which is then read by the mod to guide the game’s world generation algorithms into generating the map you created.
Check it out at vintagestory.at
Category: Resources
Navigate
Category
Tag
API automation caves chunk collab custom-object-layer dannypan distant-horizons export github grayscale heightmap import java javascript legacy loot mapsize mca-selector merge new-feature noob ocean optimize ores plugin populate read-only region render river rivers schematics script scripting structures super-flat TODO tutorial vanilla-transition vintage story water worldedit
-

Export for Vintage Story
Export maps made with World Painter into Vintage Story!
Details
-

ALingll Sage Gardening Plugin
Adds the Gardening Layer, that supports any type of mod or vanilla plant using a JSON config file
Details
READ AND DOWNLOAD DIRECTLY ON GITHUB

Sage Gardening is a plugin for WorldPainter that introduces a new custom layer: the Custom Gardening Layer, which behaves similarly to the Custom Plant Layer.
However, unlike the Custom Plant Layer, the key differences are:
👉 The Custom Gardening Layer does not define plant structures through hard-coded logic. Instead, it uses external JSON files to describe them with Patterns.
👉 Sage Gardening already comes with built-in support for most plants from VerdantVibes and Biomes O’ Plenty, which can be easily accessed from the menu.This means you can easily:
- Define structures for vanilla or modded plants;
- Extend new plants without changing the plugin’s code;
- Share and reuse JSON Pattern files, making plant configurations more intuitive and maintainable.
A Pattern is the “blueprint” of vegetation. It describes what blocks a plant consists of and how those blocks are arranged, ordered, and combined.
- Composition: Defines which blocks (e.g., trunk, leaves, flowers, vines) are used;
- Order: Specifies the placement sequence (e.g., trunk first, then flowers);
- Arrangement: Determines how blocks are placed, such as upright stems, layered leaves, spherical canopies, or branching/symmetrical structures;
- Transformations: Supports rotations, height variations, and other variants, allowing a single Pattern to generate diverse plant appearances.
-
Prepare Patterns
Place your JSON Pattern files in the plugin’s configuration directory. Some built-in Patterns are already included and will appear automatically in the dropdown list.
User-provided JSON files should be placed under:
plugin_data\gardening_layerinside the WorldPainter configuration directory.
For example, on Windows:
C:\Users\{UserName}\AppData\Roaming\WorldPainter\plugin_data\gardening_layer\{YourJson}.json -
Select a Pattern
Add the Sage Gardening Layer in WorldPainter, then choose your desired Pattern from the dropdown menu. -
Paint & Export
Configure and paint the layer just like the native Custom Plant Layer. When exporting, the plugin generates vegetation according to the Pattern’s description.
Note: Modded plants will appear as magenta wool in the preview. -
Define Your Own Patterns
See the reference here.

- Decoupled structure: Plant blueprints are stored in JSON configs instead of hard-coded logic, making them more flexible.
- Mod support: Directly reference modded blocks in Patterns without editing code.
- Reusable & shareable: Pattern files can be bundled into “plant libraries” for teams or community sharing.
- Environment validation strategies: Choose how to handle foundation blocks (ignore / check / replace) and configure growth environments (terrestrial / submerged / floating) to ensure plants generate correctly.
- The plugin is still under active development. If you encounter bugs, please report them via GitHub.
- Always back up your
.worldfiles before using this plugin to avoid potential data loss.
By default, the icons shown in the Gardening Layer Editor’s GUI will not be displayed (this does not affect functionality).
To enable these icons, you need to have the corresponding mod’s.jarfile on your computer and complete the following steps:- Open or create the
settings.jsonfile inside the plugin configuration directory (the same directory where Pattern files are stored).
For example, on Windows it is typically located at:
C:\Users\{UserName}\AppData\Roaming\WorldPainter\plugin_data\gardening_layer\settings.json - Paste the following content into the file:
{ "resources":{ "verdantvibes":"D:\\path\\to\\you\\mod.jar", "biomesoplenty":"D:\\path\\to\\you\\mod.jar" } }- Replace the above paths with the actual paths to the mod files on your PC.


- Add a snapshot configuration to 1.21.5 plants.
- The current configuration structure writing is too complex and may be simplified in the future.
- Aquatic plants are not currently supported, but may be in the future.
- There is currently no documentation on how to write configuration JSON structures. However, a built-in configuration is provided for reference, which supports the new vegetation added by the VerdantVibes mod.
© 2025 CTI-ALingll. All rights reserved.
-

BatchSchemEdit
Edit the block types of many schematic files at once
Details
View and download directly on github

With this python program, you can load many .schem files at once, replace block types in all of them and save the changes back to schem.Download the .exe from latest release
- load .schem files
- select which blocks to replace. empty replacements will be ignored
- copy paste with ctrl+c ctrl+v
- save and load settings to/from file to be able to reuse the exact replacements
- run “replace blocks” to edit loaded schematics
- save to original or as a copy

The list of suggested blocks is updated from the loaded schematics when using “replace” and saved to minecraft_blocks.txt. Restart program to get updated suggestions.
- sponge v2 (default worldedit)
python installed on system python dependecy manager like pip
pip install -r requirements.txt
python SchemBlockReplacer.py


Schematic Preview will bulk-generate preview images for every .schem file in a folder , including subfolders with a single click. All images are saved to the scripts directory inside the search folders name. Use it to quickly get a visual overview over a schematics pack. Run the app:
pip install -r requirements.txt python SchematicPreview.py- Select a directory to search for schematics:

- Renders are saved into the folder name you searched in:

- Additionally, a combined.png is generated which combines all schematic renders into on file:

Additional: Unknown blocks use purple color. The block colors are based on worldpainter color information in mc-materials.csv
Notes: The renders shown in this documentation come from:
-

Aepplestan LootPainter
create your own custom loot tables and inject them into schematics for automatically filled lootchests
Details
View and download directly on github
LootPainter is a lightweight Python tool designed to create, modify, and inject loot tables into target container blocks within Minecraft schematic files (.schem, .schematic, .nbt), primarily for use in WorldPainter. It allows users to create their own custom loot tables and inject those loot tables into schematics, as well as creates an appropriate datapack for the map folder.
- Visual Interface: Create and modify simple loot pools without writing JSON.
- Preset System: Includes preset tables for generic Dungeons, Shipwrecks, Villages, and more.
- Items: Contains an incomplete list of common loot items, but you can type in any item ID manually.
- NBT Editor: Add enchantments, names, colors, and potion effects to items.
- Export: Generates a ready-to-use datapack folder structure.
-
Batch Processing: Select a folder of
.schematic.schemor.nbtfiles. - Targeting: Automatically finds containers (Chests, Barrels, Shulkers, etc.) inside the schematic.
-
Injection: Replaces the target container’s contents with your custom
LootTablepath string (e.g.,custom:chests/dungeon_tier_1).
Download the latest executable from the Releases tab. No Python installation required.
- Select a preset or import an existing .json loot table.
- From there you can type in an item ID or select one from the drop-down.
- “W” is your weight or probability, while “Min” and “Max” refer to minimum and maximum stack size.
- To edit an item’s nbt data, you can select it from the list, click “edit nbt”, and from there add what tags you like.
- “Simulate Chest” opens a new window that simulates a chest so you can get a good idea for how the weight and stacks work.
- Click “generate datapack” and keep this datapack to be placed in your map folder after exporting in WorldPainter. The “Filename” here will be needed in the “Injector” tab under “Loot Table String”
- Select the folder of schematics you’d like to inject
- Create an output folder and select it, this will place new edited copies of your schematics and keep the originals untouched for backups
- Target containers require the loot table string, which is “custom.[container]/[filename]”
- The loot table string points to the datapack created on the first tab
- Duplicate IDs: The generator currently does not prevent you from adding the same item ID twice. If you do, the last one entered will overwrite the previous ones in the final JSON.
- Generate Chest: Sometimes item icons don’t get displayed, and show as a yellow “!”. Hovering over the items shows its details however.
- Import .json: Currently this is a “lossy” import as LootPainter doesn’t mess with certain nbt tags that might appear in other loot tables. If you import a complex loot table containing conditions, predicates, or advanced functions, those extra features will be stripped out upon import.
- Supported Containers: Currently supports Chests, Barrels, Shulkers, Dispensers, Droppers, and Hoppers. Modded containers are not supported.
- The “Coordinator” tab is currently disabled in this beta build as it undergoes a rewrite.
- Clone the repository.
- Install dependencies:
pip install nbtlib
-
Slabify Plugin
A plugin for WorldPainter that adds slab and stair detail to terrain.
Details
READ AND DOWNLOAD DIRECTLY ON GITHUB
This is a WorldPainter plugin designed to add slab and stair detail to terrain and increase the effective resolution of the terrain. Current version: 1.0.1 (Snapshot 2)
Currently, the following is supported:
- Automatic stair and slab placement on terrain
- Support for Conquest Reforged shapes such as vertical slabs
- Bicubic and bilinear interpolation to upscale the internal heightmap


Place the
SlabifyPlugin-X.X.X.jarinto the WorldPainterpluginsfolder. On Windows, this would be%AppData%/Roaming/WorldPainter/plugins. Alternatively, you can click on “Open plugins folder” in the WorldPainter toolbar.
Creating a slab layer is done in a similar manner to a custom object layer.


Number Name Description 1 Name The name of the layer. 2 Paint The color of the layer. 3 Material The material of the slab. This is not used if Option 5 is selected. The blocks must be full blocks. For example, minecraft:stoneis correct, butminecraft:stone_slabwill result in an error.4 Replace non-solid blocks Select this option to ensure slabs and other shapes will replace non-solid blocks like grass. 5 Mimic underlying blocks Select this option to enable Options 10 to 15. 6 Height increase The amount to increase the height by. Allowable values range from 0 to 1.5. Setting this value to 0 will result in both the removal and addition of blocks to the terrain. Setting this value to 0.5 will result in (typically) only the addition of blocks to the terrain. For reference, the WorldPainter frost layer increases the terrain height by 0.5. 7 Use Conquest blocks Select this option to allow blocks from the conquestnamespace. This option must be selected to enable the additional Conquest shapes.8 Allowed shapes Click this button to open a dialog to select the shapes to use (e.g., stairs and slabs). 9 Interpolation method The interpolation method to use to inform slab and shape placement. Bilinear is faster and bicubic is slower. However, bicubic interpolation results in sharper images and may result in better-looking terrain in certain applications. 10 “Mimic” table This table will only be active if Option 5 is selected. This allows the placement of a certain slab material on top of a terrain material. For instance, if the underlying block is minecraft:stoneand the slab block isminecraft:diorite, diorite slabs and stairs will be placed on top stone blocks whereever needed. Like Option 3, the slab block must be a full block.minecraft:dioriteis correct, butminecraft:diorite_slabis not!11 Add table entry Add an extra row to the table. 12 Remove table entry Remove the last row of the table. 13 Load configuration Load a previous table configuration from file. 14 Save configuration Save the current table configuration to file. 15 Visualizer Visualize how the slabs/stairs would look on the underlying block. 
All the shapes should be self-explanatory. Note that in Vanilla Minecraft, the shape is only available for
minecraft:snow_block(as snow layers). No issues will arise if a shape that is not available is selected.Advanced: After running the plugin at least once, there should be a file
%AppData%/Roaming/WorldPainter/mapping.csv. This file links together blocks and their slab and stair (and Conquest shape) variants. The first column represents the block to be entered and the remaining columns represent the variants connected to that block. If you are unsure which block to enter to get a certain slab material, this file is your guide. While you can also add your own rows to this file, it is comprehensive for both Vanilla Minecraft and Conquest Reforged.This plugin is still under development. If a bug occurs, please contact me through Discord or create an issue. Files with layers created by older versions will be backwards compatible with newer versions unless noted otherwise. As my time is limited, contributions are highly welcome!
Slabify is open source software, licensed under the GPL version 3. This means that if you distribute it, original or in modified form, you must also distribute it (including your changes) as open source under the GPL version 3 (or later). See the LICENSE file for details.
-
How To: Plugin Developement
How to develop a plugin for worldpainter
Details
This post will give you an overview on how a plugin for worldpainter can be developed and what you need to get started.
A worldpainter plugin is like a mod for worldpainter. It is written in java, compiled into a .jar, placed into worldpainter/plugins folder and loaded automatically by worldpainter when the program starts.
It is much faster than the worldpainter scripts and allows to add to worldpainters functionality. This includes (but is not limited to):- add new operations
- add new layers
- add new custom layers
- add new layer editors (GUI)
- add new exporters
- add new custom object providers
a showcase on whats possible with plugins: MacroMachine in 100 seconds
Prerequisites to plugin development
- You must be able to write, compile and run java code
- Java IDE (recommended Intellij Community or Ultimate)
- Maven installation
- Worldpainter installation
- Git installation
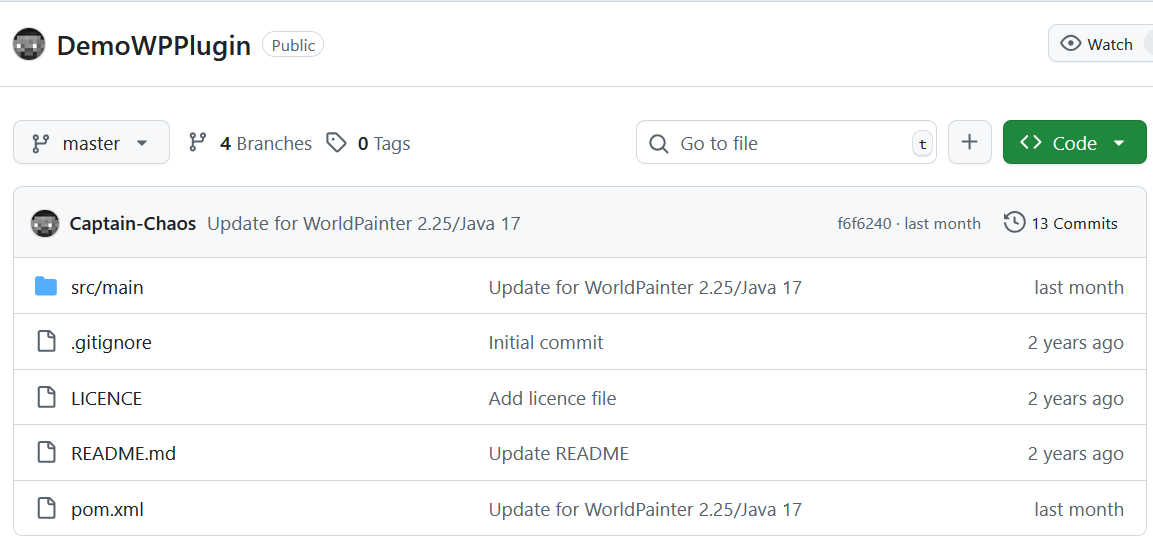
This github repository contains an example plugin set up by CaptainChaos (the worldpainter dev). It showcases whats already possible with the worldpainter plugin API. Clone it locally and you can extend it to your needs:
DemoWpPluginClone the worldpainter repository, so you can search in it how the code works:
Worldpainter RepositoryWorldpainter uses Java Swing for its GUI, if you want to make a complex plugin with custom GUIs/Editors, you might want to learn how Swing works:
Java SwingThe community has only recently started to publish plugins. As of now, only the first 4 have releases (that i know of):
- Custom Garden Layer
- Expand Layer
- MacroMachine
- CubicChunks
- MineTest Exporter
- WorleyCaves
- WurmUnlimited Exporter
- Slabify
Update Jan 2026:
A couple plugins exist now, check out the plugin category!Setup
See this README file for the necessary steps to set up the required maven dependencies:
READMEWorldpainter uses JIDE Dock, an external framework in its GUI. The problem is, that you cant just download JIDE from maven, because the source code is closed-source. The offical worldpainter guide suggests to contact JIDE, get an open source license and the dependency jars from there. I tried that, their forum looks dead and they never activated my account or contacted me back.
Instead, you can use the .jar files that come with your worldpainter installation. For compiling you need the files for windows AND linux (but worldpainter only installs the required ones), so i provide the .jars in this repository, you need to download all 3 jide .jars:
repositoryAfter downloading, you need to install the jide jars with maven, so that maven can find them when looking for dependencies (see README file tutorial above)
If you have no experience with maven, get some basic tutorials in on how to use it. AI is really good now writing POM.xml
Developement
After you have made your changes to the code, you can use maven to start a worldpainter that has your current plugin loaded, to test it inside worldpainter.
Use maven test with the testWithWorldpainter profile.
The release profile is the one used for compiling release artifacts.The most relevant classes to do things inside worldpainter is Dimension.java
It represents the currently loaded project and you can read/write terrain, height, water, layers etc in it.Warning: The worldpainter plugin API is not perfect. Some things are wierd and you have to go to great lengths to make simple things work. Often times things are set private that you need access to.
You can contact CaptainChaos and ask if there is a better solution, he is willing to adapt the API to make things easier.
The current core idea (as i understand it) is that your plugin and classes implement certain interfaces (like CustomLayerProvider or BrushOperation), which worldpainter will use to integrate your new functionality into the existing framework, like offering a new brush operation.Releases
Worldpainter has a signing mechanism for plugins. It will refuse to load any plugins in the worldpainter/plugins folder, that are not virtually signed by the worldpainter build server. The official reason for this mechanism is to prevent malware being loaded in by unsuspecting users. So far CaptainChaos has not expressed interest in removing this obstacle.
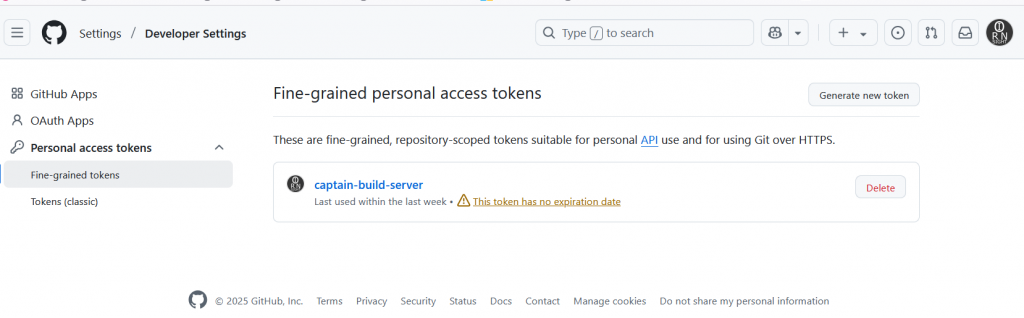
In order to get your plugin signed, you need to contact CaptainChaos (use reddit or discord). You need to set up a way for the build server to push the build-artifact to your github repository. I use a fine grained access token, which grants the buildserver write access to my repo (which is a security risk, but whatever).
The build server will detect any pushes to a specific branch you chose, and then build a release for that push every time.
I use a separate release branch, that i only push to whenever i want to make a release.
Once the build server is done, it creates a release in your repository that has the signed .jar artifact attached. Users can then download the jar file and use it in their worldpainter.A workaround to load unsigned jar files, is to add your jar file to the worldpainters class path. Usually you dont need that because you can start wp + plugin form your IDE. In case you need it: get the command line arguments used to start wp with testInWorldpainter, add you own jar file to the class path, combine the command line so it can be run in powershell or whatever you use. Then start the normal worldpainter.exe using this command line. Worldpainter will accept any plugin that is part of its classpath, unsigned or not.
Relevant technologies
This section is targeted at less experienced java developers.
- If you dont understand something (including steps in this tutorial) let AI explain it to you.
- Learn Java Swing if you want to make custom GUIs.
- Set up JUnit tests in your repository, dont test manually by hand but automate it instead
- Learn how to use the debugger, stepper and breakpoints (with conditions) in Intellij
- Use hot reload
- Use the VisualVM sampler to performance-profile your plugin to figure out what bottlenecks limits the performance. Dont guess where bottlenecks are.
- You can attach to worldpainter with your intellij debugger to debug worldpainter itself. For that WP must have been started with a cli parameter that allows debuggers to attach to it:
-agentlib:jdwp=transport=dt_socket,server=y,suspend=n,address=*:5005
using the testWithWorldpainter profile does that. - After making a release, download the jar and test in normal worldpainter a last time before publishing. Sometimes it behaves different than when started from the IDE, f.e. regarding writing files that live in the jar to HDD
-

MacroMachine
The MacroMachine Plugin automates workflows. Its global operations in steroids!
Details

plugin github page
The MacroMachine Plugin automates global operation workflows. Define simple actions, like applying terrain to certain slopes, and combine many actions into a Macro, that is executed with a single click across the whole map. Actions and Macros are saved into the plugins folder and available in all worldpainter projects.This youtube playlist contains tutorial videos that cover the most important steps.
- go to the release page
- select the top most Macro-Machine release
- download the Macro-Machine-Plugin-x.x.x.jar file
- open worldpainter
- go to top bar -> tools -> open plugins folder
- place the downloaded jar file in the folder
- restart worldpainter
- Find the Macro tool and left click it. The macro panel will open.

- Select the macro you want to execute by left clicking it in the tree view.

- Press “Apply Macros” on the bottom, the macro will execute globally on the whole map.

- Click into worldpainter or close the Macro Panel.
- Deselect macro tool, reselect macro tool to open the panel again.
Youtube Tutorial
Let’s create a simple macro that creates a mask for us: add all Swamp and Desert biome to selection.- Create a new macro by clicking “Create Macro”. A new macro with the name “New mapping macro” appears in the tree panel.
- Left click “New Mapping Macro”. It is now shown in the macro designer on the right.

- The macro is a list of actions that are run in fixed order. Topmost action goes first, bottom most action goes last. Right now the list is still empty.
- Click “Add”, then select “create new action” in the dialog. A new action is created and added to the list. Press “save” to save the changes we made to this macro.
- In the tree view (left), expand the Macro. You can see that is now has an action listed. Select the action

- The Action Designer now opens on the right. Select “biome” as input, “set” as type, “selection block” as output.
- In the table on the right, set “swamp” and “desert” to “Selection Block: ON”. This means when the action is executed, all blocks that are “swamp” or “desert” biome are set to be selected. All blocks that are a different biome are deselected.

- Save your progressof this action with the “save” key
- Select the macro where the action lives in.
- Press “execute macro”
- All swamp and desert biome blocks are now selected, everything else is deselected

- check the “log” tab, to see some statistics about your action.

Not all actions are simple “if this, then this”, like our desert-and-swamp-to-selection example. If you want to paint pine trees in flat slopes and reduce the amount the steeper it gets, a 1:1 mapping for each angle is very tedious. For this, the gradient editor exists.
- Create an action with input: slope, type: set, output: pines

- The x axis (bottom) is the input values
- The y axis (left) is the output value
- The curve shows you which input is mapped to which output value
- Left click into the curve to add a new point
- Drag points to change where you want them
- Right click to delete a point
- Values between points are automatically interpolated
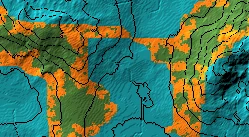
- the curve below means that pines are set with strength=10 when the slope is 0°. the steeper the area, the lower pine strength gets, up until 60° slope with strength=7. Then it falls to strength=0 at slope=70°.

- You can edit values in the table, but only where points are set. Editable values are black, Interpolated values are grey.
- Run the action on a world with a mountain

- Sometimes the input can be interpolated, but the output is fixed values, like mapping slope to annotation colors. If that happens, the gradient editor is available and you can define input ranges to map to specific values:


If you only want to operate on some parts of the map, you should use the action filter. Create an action that uses an input to set the action filter. Any actions in the macro after the filter action will ignore blocks that were previously filtered out. Use Always-set-ActionFilter to reset the filter and allow all blocks. Each filter is limited to its macro and does not influence other macros. More restrictive filters usually also mean better performance, because less tiles have to be touched by the macro.
Use the “Always” input to apply an output everywhere. Always still respects previous Action-Filters and will ignore filtered out blocks.
Spraypaint output will spraypaint a layer onto blocks with certain chance for each block.
This input/output only exists during the execution of the macro. it allows you to save values for the duration fo the execution. The alpine macro uses it to store the chance for snow in each block over multple actions, before finally applying it to snow. Its also more performance-friendly than saving the value into a layer in the world.
You can call a macro inside of another macro. But beware: if macro A calls Macro B and macro B calls Macro A, you get an infinite loop. The system will detect it and now allow you to save such a state.
It’s not yet possible to use custom layers as inputs or outputs. We are working on it.
Q: What does this panel do A: Look for the “?” button and hover over buttons to see tooltips.
Q: If i click “Apply macros”, nothing on my map happens A: check the log. usually, the macro does something under special circumstances that dont exist on your map, f.e. because the map is flat and the macro tries to paint mountains in steep areas.
Q: Something broke, what now? A: Send a bug report to @IR0NSIGHT in the discord https://discord.gg/9kRJEMfGeE or on github here. You can find your log files in the parent folder of top bar -> tools -> open plugins folder. The logs are calles logfile0.txt usually, please include the latest log file.
-
WorldPainter Expand Layer Plugin
Automatically find edges of a layer and expand it
Details
plugin github page
This plugin allows you to automatically select the edge of a layer and apply a gradient to it, growing outwards or inwards.NOTE: if you are looking for the fractal expandlayer script go here=> github expandlayer script
- go to the release page
- select the top most release
- download the Expand-layer-???.jar file
- open worldpainter
- go to top bar -> tools -> open plugins folder
- place the downloaded jar file in the folder
- restart worldpainter
- The “Select Edge Operation” can be found in the tools section of worldpainter. Select the 2 blue circles.
- Specify your wanted settings in the tool-settings section. You will probably need to adjust your layout to see all of the settings tab.
- Press “run” in the settings tab to execute the plugin
- The plugin will find all blocks that are the input layer, grow in the specified direction, apply the gradient and the paint the result as the output layer in the map
- If you press gradient: edit, a graphical editor for the applied gradient will appear.
- It shows a preview of the output, where left is the beginning of your input layer and the gradient grows to the right.
- The gradient is not to scale and will be rescaled by the operation using the selected “width” parameter.
Q: I dont see the “run” or “help” button A: Your tool settings window is to small. Drag it wider
Q: If i click run, nothing on my map happens A: You need to have blocks of your selected input layer painted on the map, otherwise nothing can and will happen.
-
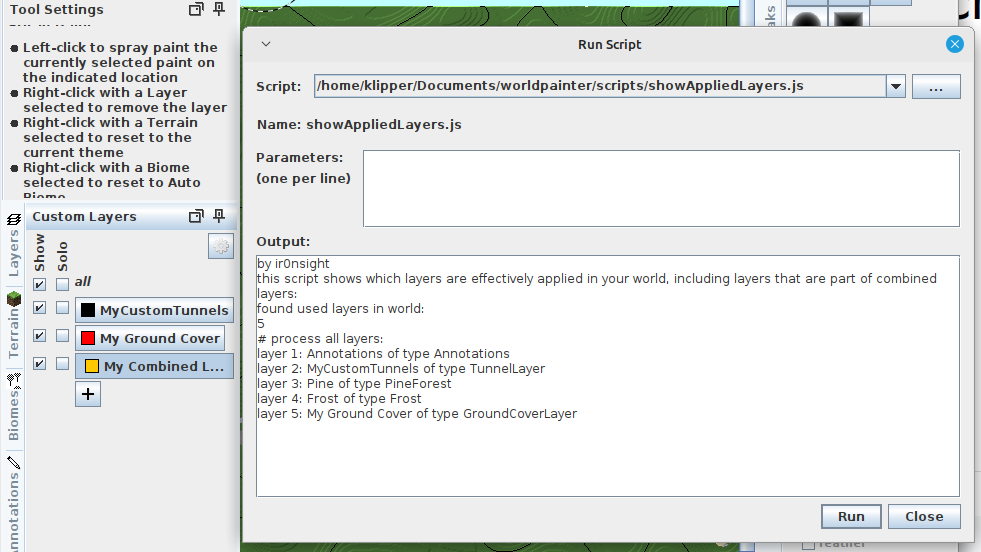
ShowAppliedLayers script
See which layers are actually applied in your world, including nested combined layers!
Details
Have you ever had to search for a buggy layer or wanted to make sure one layer is not present in your world?
One click solution: